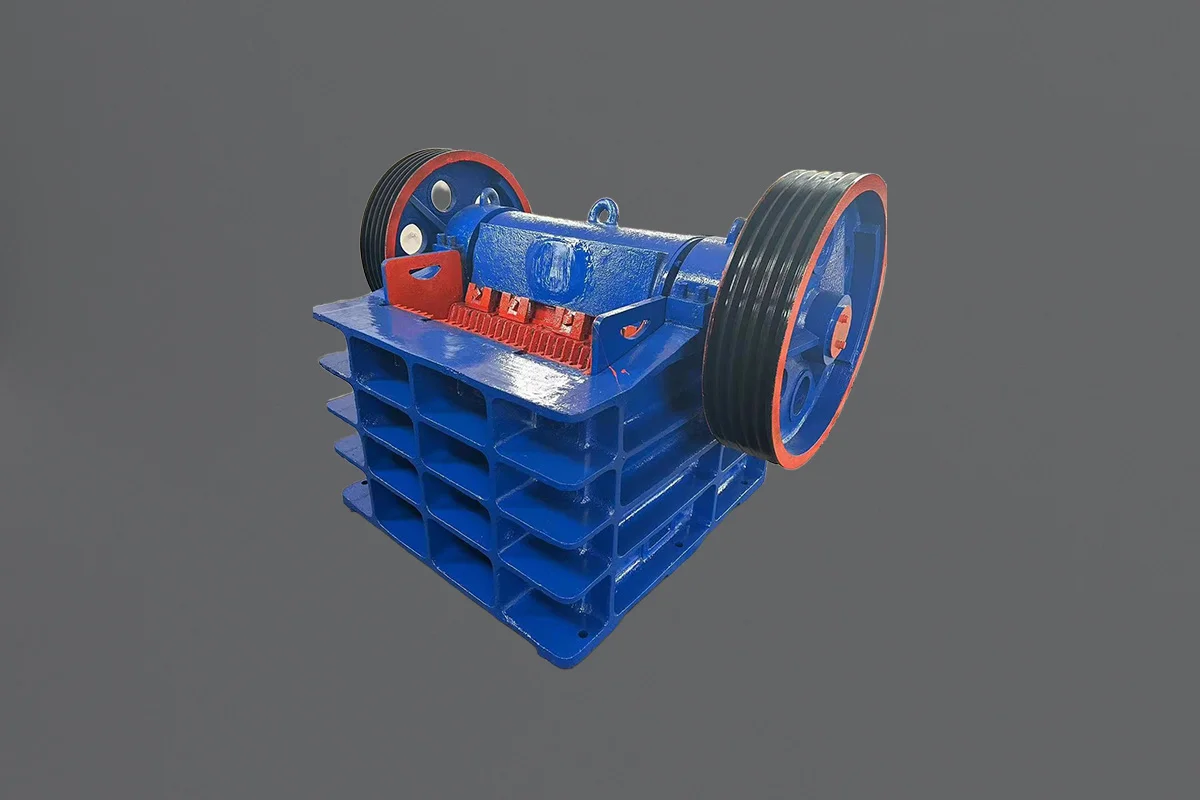
VSI Crusher Drive Belt Tensioning
Correct tensioning is the most important factor necessary for long, satisfactory drive belt operation. Too little tension will result in slippage, causing rapid belt and pulley wear, and poor efficiency. Too much tension results in excessive strain on belts, bearings (especially motor bearings), and shafts.
Measure
- Select the second belt from the bottom.
- Measure the force required to deflect the belt the distance as set out below:

- For measuring the force and deflection, Qiming Casting recommends the use of a tension gauge similar to the one represented. Using the belt tension gauge at the center of the belt span, follow these instructions:Set the large ‘O’ ring on the designated deflection as per the Belt Tension/Deflection Chart.
Push the belt tension gauge against the second to the bottom belt until the large ‘O’ ring is even with the top of the next belt. Ensure that the gauge is in the center of the belt section, and always test the belts on the tight (or driven) side of the belts.
Remove the gauge and observe that the small ‘O’ ring has moved from its original setting at zero to the number of kgs [lb] required to deflect the belt
Belt adjustment
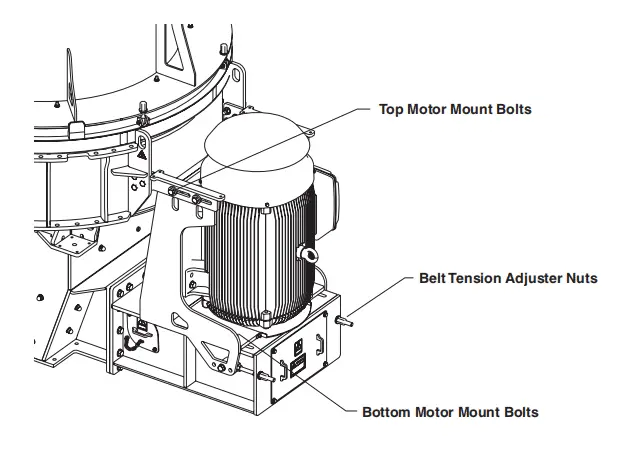
- Slightly loosen off top and bottom motor mount bolts.
- Tighten (or loosen) tension by adjusting belt tension adjuster nuts.
- Adjust belt tension as per the Belt Tension/Deflection Chart. (For dual drive, adjust both exactly the same)

New Belts
New belts will take a little time to settle into the grooves, and will naturally stretch in the first days of operation. To accommodate this settling-in process, it is recommended that the V-belts are tensioned some 20% above the optimum. Refer to the Belt Tension/Deflection Chart under the Initial Installation Tension column for the recommended tension for the standard deflection for new belts.
Tension Range
Belt tension should be monitored regularly (at least weekly), but does not need adjustment unless it falls outside the range indicated in the Normal Running Tension column.
Running in new belts
- After 30 Minutes.After thirty minutes of running it is recommended that the tension should be checked and re-tensioned to the Initial Installation Tension values.
- After 4 Hours.Re-tension to the Initial Installation Tension values
- Next 5 Days.Check tension at least once daily and you should observe a “settling”, requiring minimum adjustment to maintain the tension as per the Normal Running Tension.
Loose belts
In the event of there being one or two belts being looser than the others, tension the belts normally, and measure the deflection force required on the loose belt. If this is 10% or more below the low-range tension, then there is a danger that the loose belt could turn, or even jump off, taking the rest of the set with it. If the belt is one of a new set, then initially add an extra 1kg of pressure relative to tension to that particular side of the drive, to see if the belt will “settle in” on its own. If this has not happened within 5 days or if the loose belt does not tension up to the minimum, then the loose belt must be replaced.
Dual Drive
Belt Tension/Balanced Motor Amps
On dual-drive machines, one motor may draw less current than the other, i.e. it appears lazy. For the motors to do equal work the belt drives must be set up with equal tension. On dual-drive machines, a small difference in belt tension between drives can make a big difference in motor amps. For example, a dual drive 185 kW [250 hp] crusher under full load with 0.5% slip in one drive and 1.0% in the other will show a current draw of 170 amps in one motor and 120 in the other – a 50 amp difference.
Adjustment
Static
Follow the normal static adjustment procedure as explained above, but make a special effort to adjust the two drives to exactly the same values.
Dynamic
- With the crusher operating under load, prepare the low current motor for adjustment, ensuring that when the four motor mount bolts are loosened, the motor mount is held in place by the belt tension adjuster nuts. This is done by loosening off the two motor mount bolts that pass through the adjuster rods. (See Important Note below). Apply tension to these adjuster rods by turning the adjuster nuts approximately half a turn from hand tight.
- Then loosen off the other two motor mount bolts. Important Note: Loosen only enough to permit the motor mount to be adjusted by means of the adjuster nuts. If the top motor mount brackets are used, loosen and remove bolts during adjustment.
- Turn the adjuster nuts clockwise by one turn to tighten the belts. Retighten the four motor mount bolts and observe the current drawn by both motors for ten minutes.
- Repeat until the currents drawn by the motors are within approximately 10 amps of each other.
- After balancing amps in this way, belt tensions should be checked as soon as possible to ensure correct balanced belt tensions. If balanced amps are achieved with unbalanced tension, the cause should be investigated.
Other Causes Of Unbalanced Motor Amps
If the motors will not draw similar amps by altering belt tension, check:
- The motor or starter electric terminals. Have a qualified electrician check the motor or started terminals. If dirty they will need cleaning and re-fitting.
- The starter has a fault. To confirm starter fault exists, have a qualified electrician check the following: With the machine under load:Read both ammeters and record amps on ammeter 1 and ammeter 2;
Stop the machine;
Swap motor wiring over at starter contractors;
Restart the machine. The ammeter readings should have swapped, i.e. No. 1 should read what No. 2 used to, and vice versa. If this doesn’t happen, the electrician must check the function of the starter componentry.
- Belt alignment – Make sure sheaves are in line using a straight edge or string line.
- Motors – They should be of the same brand and type and preferably be manufactured in the same batch (check with the motor manufacturer or agent). Different manufacturers and sometimes different batches of motors have different winding specifications.
- Belts – The belts should be matched, i.e. all the same brand at least, and a matched set if possible.
- Pulleys –Check pulley axes are parallel and grooves are properly aligned with one another – any dust build-up entering under the motor mount will cause the pulleys to be out of parallel, with higher tension on belts at one end of the pulley.
Check pulley diameters. For equal power transmission, the pitch diameters of the driving pulleys must be within 0.5mm [0.02”] of each other. This can be checked by measurement as shown. Check grooves at each end of the pulley – any taper in pulley length will cause problems.
If after a period of satisfactory running the motors become difficult to match, check the pulleys for wear.
About
If you’re in the market for high-quality VSI crusher parts that can help improve the performance and efficiency of your crushing equipment, you’ve come to the right place. Our premium selection of VSI crusher parts is designed and manufactured to meet the highest standards of quality and durability, ensuring maximum performance and long-lasting wear life.
Our VSI crusher parts are made from the finest materials and crafted with precision using advanced manufacturing techniques, so you can be confident in their durability and reliability. We offer a wide range of parts to fit all major brands of VSI crushers, including rotors, anvils, shoes, and more.
At our company, we’re committed to delivering exceptional customer service, fast turnaround times, and competitive pricing. We understand the importance of having reliable crushing equipment that can keep up with the demands of your operation, which is why we’re here to help you find the right VSI crusher parts to meet your specific needs.
So whether you’re looking to replace worn-out parts or upgrade to more efficient and high-performing options, we’ve got you covered. Contact us today to learn more about our selection of VSI crusher parts and how we can help you achieve maximum performance and productivity.
